Followers

Follow this blog with bloglovin

Follow on Bloglovin

Wednesday, 13 March 2013

Whats on Your Workdesk Wednesday - WOYWW

This week I am slovenly again.  I actually took the photo Tuesday PM and knew it would still be ok this morning because I haven't tidied up and the tidy fairies don't seem to get as far as my shed!


I have had my grandma's lovely Singer out again and some lovely bits of fabric and lace.
 
Meanwhile outside, Bowser is still enjoying his gardening, I caught him trying to bury a tennis ball - I will soon have a sunken garden!
 
Why not pop over to Julia's blog - the Stamping Ground and join in the fun - it's great to look at what my online friends have on their desks.

Monday, 11 March 2013

William Morris Inspired Card


This card was inspired by a set of postcards I was given some time ago of various art work in National Trust Properties, some of them being William Morris.


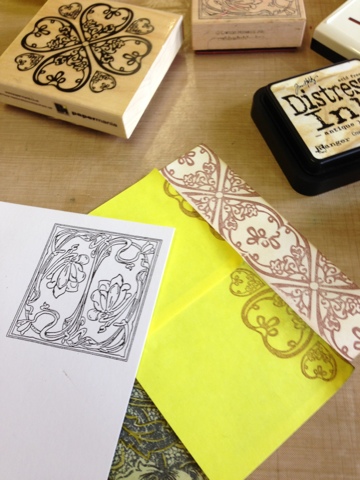
The background is a Darkroom Door stamp coloured with Distress Inks.  This was then masked off and the edge was stamped with this medalion stamp.


The main image stamp is one of the first stamps I ever bought which I haven't really ever used but I thought it was perfect for this card.


The background was further coloured with distress markers.
A wooden button, stamped with Stazon using an Inchie stamp - these little images are perfect for this.


Seam binding dyed with distress stains.

Finally the button and the red flowers were given the Glossy Accent Treatment.


I am entering this card into the following challenges:-
Frilly and Funkie Challenge - William Morris Style
Simon Says Stamp - Bit o' Green


Make my Monday First DT Make

Yippee! I am so thrilled to have been asked to join the Make My Monday Challenge Blog Design Team.

This is my first creation for this week's challenge, the theme of which is Heat Embossing.

I hope you like this card, which uses two different methods to produce a similar overall result, and will come over and join in the fun with me at Make My Monday.


I began by making a background using Dylusions Inks and a Mask.


I then embossed the image with White Embossing Powder.


The tag was stamped and embossed with Clear Embossing Powder and coloured afterwards with Distress Inks and spritzed with water.
It was then overstamped with a script stamp.


The seam binding was dyed with distress stains and the text stamped onto small squares.


Just the addition of another parchment butterfly - these critters get everywhere - and a bit of distress around the edges,

Thursday, 7 March 2013

Tattered Florals Frame with Parchment

I hope you like my frame. I have made it from layers of parchment, organza and linen for the flowers.

The leaves are oilcloth and so are the flourishes.

 The parchment butterfly was created using a multi grid and as per some of my other recent projects, this will be with be on the Pergamano Stand at the NEC on 21st March.  Please stop by and say hello if you are there.


The frame was painted with Paperartsy Fresco Paint - Vintage Lace and as you can see, I had a great time assembling the flowers and leaves.
 
The flourishes were die cut, attached with matte medium and painted with watercolour pencils.


The frame was distressed lightly with Brushed Corduroy.  I chose to leave the whole project quite light and not too grungy.
 
I will be entering this into the following challenges:-


Wednesday, 6 March 2013

WOYWW 196 and That Naughty Schnauzer

Happy WOYWW everyone. Well there I was settled for a pleasant afternoon's crafting with an episode of Hancock's Half Hour that I hadn't heard before and I thought - it's very quiet outside...
Yep there was Bowser digging a hole in my newly mown lawn as if he was late for an important appointment in Australia.
So after an impromptu bath, I'll let you guess who got the wettest, this is still what is on my work desk.
I'm off for a sneaky peak at some other desks before that naughty schnauzer gets into any more mischief.
Why not join in the fun at The Stamping Ground with Julia.


Monday, 4 March 2013

Number One Daughter's Letter Rack

In a vain attempt to get number one daughter to keep her desk tidy I thought I would make this letter rack for her to keep her important correspondence in - you know the ones, the latest Jack Wills Catalogue etc!


I began by painting the letter rack in a blue acrylic paint, when this dried I painted a further coat in white and before it had dried completely, I swiped over with a baby wipe.


I masked and stamped all over with a black archival ink pad.


The images were coloured with Derwent Inktense pencils and the whole thing was distressed with Brushed Corduroy.


I will be entering this project into the foloowing challenges:-
That Craft Place - Anything Goes
Pan Pastel Challenge - Alter It
Simon Says Stamp - Anything Goes


Liebster Award

Thank you to my lovely friend Jenny at Pushing the Right Buttons for nominating me for this:-

About the Award - This award was designed to be a blog award in the pay it forward fashion. Once you've been nominated you award it to blogs that you like that have fewer than 200 followers to encourage new visitors to visit these new blogs.
Rules for Acceptance - Thank the person who gave you the award and link back to their blog. Post the award onto your blog. Give the award to 5 bloggers who you appreciate that have fewer than 200 followers. Leave a comment on their blog letting them know that you have given them this awesome award. 

Here are my forward links, not necessarily all new blogs but ones I like:-

Sand at sandcastle - sandcastlesintheair

Annie at Curious and Crafty Treasures

Shaz at Shaz Silverwolf

Carol at CeeBeeCards

Dagmar at schaerfchenskreativweltrt